iPhone & iPad Screen Recordings

iPhone & iPad Screen Recordings

How to record the screen on your iPhone, iPad or iPod touch

In iOS 11 or later, and iPadOS, you can create a screen recording and capture sound on your iPhone, iPad or iPod touch.

Record your screen

  1. Go to Settings > Control Centre > Customise Controls, then tap  
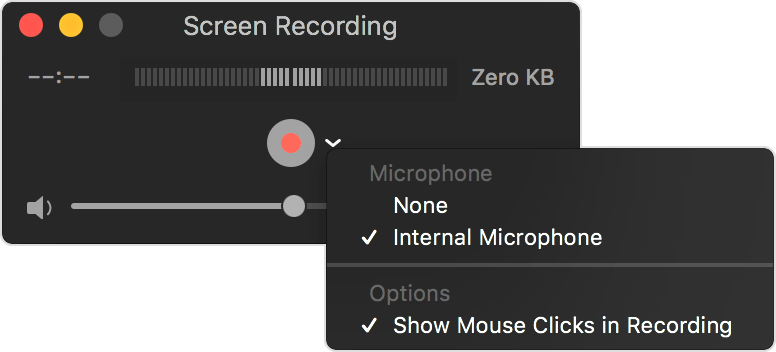
next to Screen Recording.
  2. Swipe up from the bottom edge of any screen. On iPhone X or later or iPad with iOS 12 or later, or iPadOS, swipe down from the top-right corner of the screen.
  3. Press deeply on grey record icon and tap Microphone.
  4. Tap Start Recording, then wait for the three-second countdown. 
  5. Open Control Centre and tap red record icon. Or tap the red status bar at the top of your screen and tap Stop.

Go to the Photos app and select your screen recording.

Some apps might not allow you to record audio. You can’t record your screen and use screen mirroring at the same time.

Is Your Phone Tracking You?

Is Your Phone Tracking You?

The True answer is, YES!

If you have a smart phone it has GPS, Global Positioning System, functionality.  

The real question is who has access to this information.  According to Apple and Google you can turn this function or Location Setting off for apps and in general.  Now they have opted to make the Covid location and notification function a part of the operating system as opposed to an app like Health or Four Square for instance that you can disable easily.  

To that end we have provided you with a step by step method to opt in or out.

It is our belief that YOU should always be in control of ALL forms of your Privacy and security.

How to disable COVID-10 Exposure Notifications
iPhone users

COVID-19 Exposure Notifications will be turned on by default at the system level on iPhone via an upcoming iOS 13.5 software update. Once your iPhone is running that update, if you want to adjust your COVID-10 Exposure Notifications’ settings, you can do so.

Just follow these steps:

  • Go to Settings on your iPhone
  • Swipe down and tap Privacy
  • Choose Health
  • Tap COVID-19 Exposure Notifications at the top
  • Tap the toggle to turn notifications off (or on if you already turned them off)

What Is Managed IT?

What Is Managed IT?

Simply Put, Managed IT Services are an expert tech department for Your company!

Almost every company needs IT support.  That is a fact in our advanced world.  Communications, Security and Data Management are fundamental areas of a businesses focus if it is to thrive.  

Administration ,maintenance and security of your online software, users, communication, data and policies to ensure business continuity are very important elements in planning for the growth of your company.

Managed IT helps the business decision makers to focus on their core strategic skills and rely on experts in the field to keep them current and secure in an ever more complex digital world.

The Cloud

By migrating your data into the cloud and administering it there we can eliminate the need for backups and increase security access to critical data.  The cloud offers access that is not tied to a geographical location.  If you can connect to the internet you can securely access your communications and data of any kind.

Technical Support

As a Managed IT partner our service desk can login to your company’s managed machines and solve any technical issues, assist with user issues and help guide and collaborate with your teams to enhance your business capabilities.

Collaboration Solutions

We can help your employees work more effectively using a team based approach software system.  There are a number of options and we administer them all.  Microsoft 365 Teams, Zoom, Cisco Webex, Zoom and Team Viewer are some more well known examples.  This type of software solution gives your team a centralized online meeting point for messaging, video conferencing, data sharing, scheduling and accountability.

Access to Special Projects

As a managed partner, you will have access to our special projects department.  Have you ever had an idea that required a technical solution for it to become reality?  An App that you think could be the next great thing or could make your services more accessible to clients?  We have a solution based mindset and access to all sorts of expertise to make your ideas reality.  ZeroLimits is not just our company name but our philosophy.

Web Support

Our Clients websites, domain management and email support is a large component of our focus.  We understand that your website and critical communication is your Company’s face to the world and first impressions are important.  We aim to support you in all aspects of your Internet experience from design and development to SEO and analytics.  We can offer hosting and Domain purchasing as well.

Secure Policies and Procedures

As a company, one of the critical areas of security concern is how data is handled and by whom.  Working with our clients to develop policies and procedures we can help to mitigate security concerns.  On-boarding and off-boarding employees can be handled smoothly and securely without potential data loss and damage to the companies reputation.

These are just a few areas our Managed IT Solutions can assist you with!

How Can YOU Help?

How Can YOU Help?

Do you know someone who’s company is beginning to need technical help?
Are they great at what they do but are struggling with their computers?

As companies reach a particular size they begin to require specialization.  Accounting is usually the first to break off.  Shortly thereafter a business starts to need an IT expert to help.  One who can guide them through the myriad of offerings, services and technologies just to continue Business as Usual.

As companies grow large enough they can afford an internal IT department who can set in place policies and security procedures. This allows the company to leverage the advantages of new tech, while at the same time protecting the data that has given the company it’s fighting edge.

Are the back up procedures in place across the company to mitigate data loss?  Are the company’s data assets, including financial records safe from employee attrition and off-boarding?

These are examples of issues that enterprise level corporations deal with everyday and can be a costly lesson if not prepared for as a small business grows.

We are here to help!  ZeroLimits and Associates have a long history handling start up and enterprise level clients.  We are choosing to focus on smaller businesses that the large Managed IT firms have left behind.  

If you know of someone who might benefit from our special talents, Please recommend us to your friends and we will take it from there!

Just send them this link: https://www.zerolimits.com


Video Screen Recordings

Video Screen Recordings

How to record the screen on your Mac

You can make a video recording of the entire screen or just a selected portion of it.

Use Shift-Command-5

If you’re using macOS Mojave or later, press Shift-Command (⌘)-5 on your keyboard to see onscreen controls for recording the entire screenrecording a selected portion of the screen or capturing a still image of your screen. You can also record the screen with QuickTime Player instead.

Record the entire screen

  1. Click the Record Entire Screen button in the onscreen controls. Your pointer changes to a camera .
  2. Click any screen to start recording that screen or click Record in the onscreen controls.
  3. To stop recording, click the Stop Recording button in the menu bar. Or press Command-Control-Esc (Escape).
  4. Use the thumbnail to trim, share, save or take other actions.

Record a selected portion of the screen

  1. Click the Record Selected Portion button in the onscreen controls. 
  2. Drag to select an area of the screen to record. To move the entire selection, drag from within the selection.
  3. To start recording, click Record in the onscreen controls.
  4. To stop recording, click the Stop Recording button in the menu bar. Or press Command-Control-Esc (Escape).
  5. Use the thumbnail to trim, share, save or take other actions.  

Trim, share and save

After you stop recording, a thumbnail of the video appears briefly in the lower-right corner of your screen.

  • Take no action or swipe the thumbnail to the right and the recording is automatically saved. 
  • Click the thumbnail to open the recording. You can then click the Trim button to trim the recording, or click the Share button to share it.  
  • Drag the thumbnail to move the recording to another location, such as to a document, an email, a Finder window, or the Bin. 
  • Control-click the thumbnail for more options. For example, you can change the save location, open the recording in an app or delete the recording without saving it.

Change the settings

Click Options in the onscreen controls to change these settings:

  • Save to: Choose where your recordings are automatically saved, such as Desktop, Documents or Clipboard.
  • Timer: Choose when to begin recording: immediately, 5 seconds or 10 seconds after you click to record.
  • Microphone: To record your voice or other audio along with your recording, choose a microphone.
  • Show Floating Thumbnail: Choose whether to show the thumbnail
  • Remember Last Selection: Choose whether to default to the selections you made the last time you used this tool.
  • Show Mouse Clicks: Choose whether to show a black circle around your pointer when you click in the recording.

Use QuickTime Player

  1. Open QuickTime Player from your Applications folder, then choose File > New Screen Recording from the menu bar. You will then see either the onscreen controls described above or the Screen Recording window described in the following steps. 
  2. Before starting your recording, you can click the arrow next to the Record button to change the recording settings:
    • To record your voice or other audio with the screen recording, choose a microphone. To monitor that audio during recording, adjust the volume slider (if you get audio feedback, lower the volume or use headphones with a microphone). 
    • To show a black circle around your pointer when you click, choose Show Mouse Clicks in Recording.
  3. To start recording, click the Record button and then take one of these actions:
    • Click anywhere on the screen to begin recording the entire screen.
    • Or drag to select an area to record, then click Start Recording within that area.
  4. To stop recording, click the Stop button in the menu bar or press Command-Control-Esc (Escape).
  5. After you stop recording, QuickTime Player automatically opens the recording. You can now play, edit, or share the recording.

Learn more

  • When saving your recording automatically, your Mac uses the name ”Screen Recording date at time.mov”.
  • To cancel making a recording, press the Esc key before clicking to record.
  • You can open screen recordings with QuickTime Player, iMovie and other apps that can edit or view videos.
  • Some apps, such as DVD Player, might not let you record their windows.
  • Learn how to record the screen on your iPhone, iPad or iPod touch.

Contact Form

EnglishFrenchItalian